
Getting started
In this guide, we’re going to kickstart our small business with the use of AdminJS, Leaflet maps, and jspdf. By the end of the tutorial, you will be able to save your client’s data, display it on a functional map and generate shipping labels with just one click.
.
├── src
│   ├── index.ts
│   ├── custom_components
│   │   ├── geocoding.component.ts
│   │   ├── pdfgenerator.component.tsx
│   │   └── pdfgenerator.ts
│   ├── models
│   │   └── customer.model.ts
│   ├── pdfs
│   │   └── ...
│   ├── public
│   │   └── leaflet.css
│   └── resources
│       └── customer.resource.ts
├── tsconfig.json
└── package.json
The repository for this project is available here: https://github.com/AdamFrydrychRST/EcomArticle
Setting up the database
We will be using the MongoDB database for this project.
We will also take advantage of Docker for this, as it’s very convenient and makes the configuration (if needed) a breeze.
First, create a ‘mongodb.yml’ file inside of which put the following:
version: '3.1'

services:

  mongo:
    image: mongo
    restart: always
    environment:
      MONGO_INITDB_ROOT_USERNAME: root
      MONGO_INITDB_ROOT_PASSWORD: example
    ports:
      - 27017:27017
Save the file, navigate to its’ directory in your terminal, and start it up with docker-compose.
$ docker-compose -f mongodb.yml upSetting up AdminJS
We will need a simple instance of AdminJS to build more intricate custom components. First, the dependencies:
$ yarn add adminjs
$ yarn add express
$ yarn add express-formidable
$ yarn add express-session
$ yarn add @adminjs/express
$ yarn add @adminjs/mongoose
$ yarn add -D ts-node
$ yarn add -D typescript
$ yarn add -D tslibStart within the ‘src’ directory by creating a file named ‘index.ts’. Inside there are a couple of important things — we need a database adapter, and we also need to facilitate a connection to the database, once we have both of those things we need to create an AdminJS instance to which we will pass all the custom components, options, and settings.
import AdminJS from 'adminjs'
import express from 'express'
import AdminJSExpress from '@adminjs/express'
import { Database, Resource } from '@adminjs/mongoose'
import mongoose from 'mongoose'

const PORT = 3001

// We'll need to register the mongoose Adapter
AdminJS.registerAdapter({
  Database,
  Resource
})


const start = async (): Promise<void> => {
  const app = express()

  // This facilitates the connection to the mongo database
  try {
    await mongoose.connect('mongodb://root:example@127.0.0.1:27017')
    console.log('Successfully connected to the DB')
  } catch (error) {
    console.log(error)
  }

  const admin = new AdminJS({
    resources: []
  })

  const adminRouter = AdminJSExpress.buildRouter(admin)

  app.use(admin.options.rootPath, adminRouter)

  app.listen(PORT, () => {
    console.log(`AdminJS started on http://localhost:${PORT}${admin.options.rootPath}`)
  })
}

start()
Let’s start working on our resources. First, we’ll need a mongoose schema, next a model, and then finally an AdminJS resource. Starting with the mongoose schema. Inside the ‘models’ directory create a ‘customer.model.ts’ file.
import { model, Schema, Types } from 'mongoose'

export interface Customer { // Our TypeScript interface
  id: Types.ObjectId
  name: string
  address: {
    street: string
    buildingNumber: string
    apartamentNumber: string
    city: string
    postCode: string
    country: string
  }
  phone: number
  email: string
  latitude: string
  longtitude: string
}

export const CustomerSchema = new Schema<Customer>({ // A schema matching the interface
  name: { type: String, required: true },
  address: new Schema({ // Note the syntax for nested structures
    street: { type: String, required: true },
    buildingNumber: { type: String, required: false },
    apartamentNumber: { type: String, required: false },
    city: { type: String, required: true },
    postCode: { type: String, required: true },
    country: { type: String, required: true }
  }),
  phone: { type: Number, required: true },
  email: { type: String, required: true },
  latitude: { type: String },
  longtitude: { type: String }
})

export const CustomerModel = model<Customer>('Customers', CustomerSchema)
Now, with the model created, we can start taking care of the resource. Inside the ‘src’ folder create a directory named ‘resources’ and inside of it create a file called ‘customer.resource.ts’.
import { CustomerModel } from '../models/customer.model.js'
import { ResourceWithOptions, FeatureType } from 'adminjs'

interface CreateResourceResult<T> {
  resource: T
  options: ResourceWithOptions
  features?: FeatureType[]
}

export const createCustomerResource = (): CreateResourceResult<typeof CustomerModel> => ({
  resource: CustomerModel,
  features: [],
  options: {
    navigation: {
      name: 'Customers',
      icon: 'Events'
    },
    actions: {},
    properties: {
      longtitude: {
        isVisible: false
      },
      latitude: {
        isVisible: false
      },
      id: {
        isVisible: false
      }
    }
  }
})
The last thing is to pass the resource into our AdminJS options. In the ‘index.ts’ file head to the ‘start’ function and add our resource.
const start = async (): Promise<void> => {

// ...

  const admin = new AdminJS({
    resources: [
      createCustomerResource()
    ],
  })

// ...

}
This will get us a basic CRUD, that enables us to store customer data needed for shipping.
Implementing Leaflet Map
The Leaflet map feature has been recently added to AdminJS, the documentation is available here. We’re going to take advantage of a map object with a single marker. In order to parse our customer’s address into coordinates we will use the Nominatim API. Nominatim is a reverse geocoding tool.
Let’s start with adding Leaflet maps first, however.
$ yarn add @adminjs/leafletWe will need to serve the CSS file as a static file and create an instance of the AdminJS component loader.
In the ‘index.ts’ file, add the following lines:
import AdminJS, { ComponentLoader } from 'adminjs'
import { getLeafletDist } from '@adminjs/leaflet'

// ...

export const componentLoader = new ComponentLoader()

const start = async (): Promise<void> => {
  const app = express()

  app.use(express.static(getLeafletDist()))

// ...

const admin = new AdminJS({
    resources: [
      createCustomerResource()
    ],
    componentLoader,
    assets: {
      styles: ['/leaflet.css']
    }
  })

// ...

}
In your ‘customer.resource.ts’ file, we will have to provide the leaflet feature inside of the ‘createCustomerResource’ function.
import leafletFeatures from '@adminjs/leaflet'
import { componentLoader } from '../index.js'
// ...
features: [
leafletFeatures.leafletSingleMarkerMapFeature({
componentLoader,
paths: {
mapProperty: 'location',
latitudeProperty: 'latitude',
longitudeProperty: 'longtitude'
},
mapProps: {
center: [50.04, 10.06],
zoom: 4
}
})
],
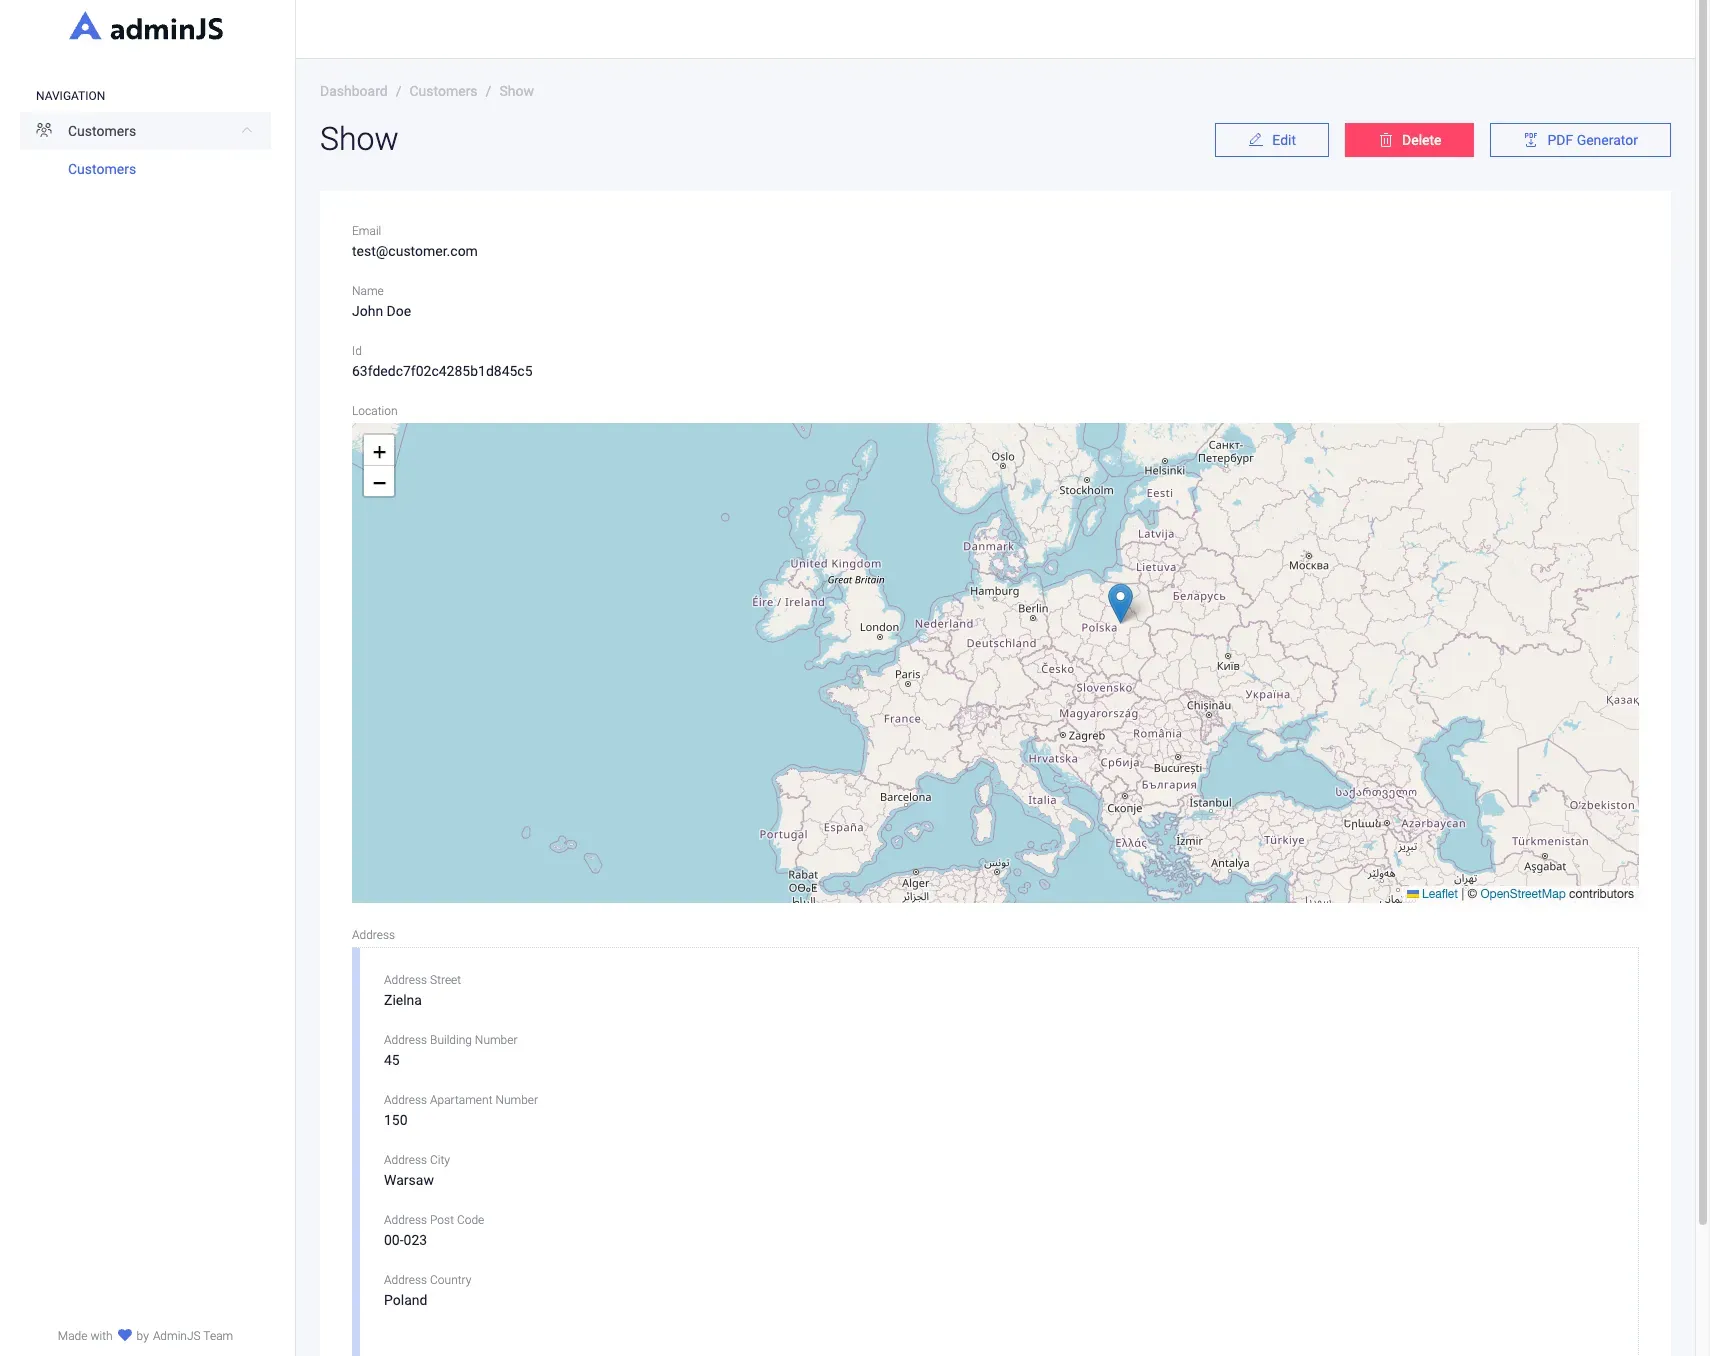
// ...Let’s take a look at what it looks like.
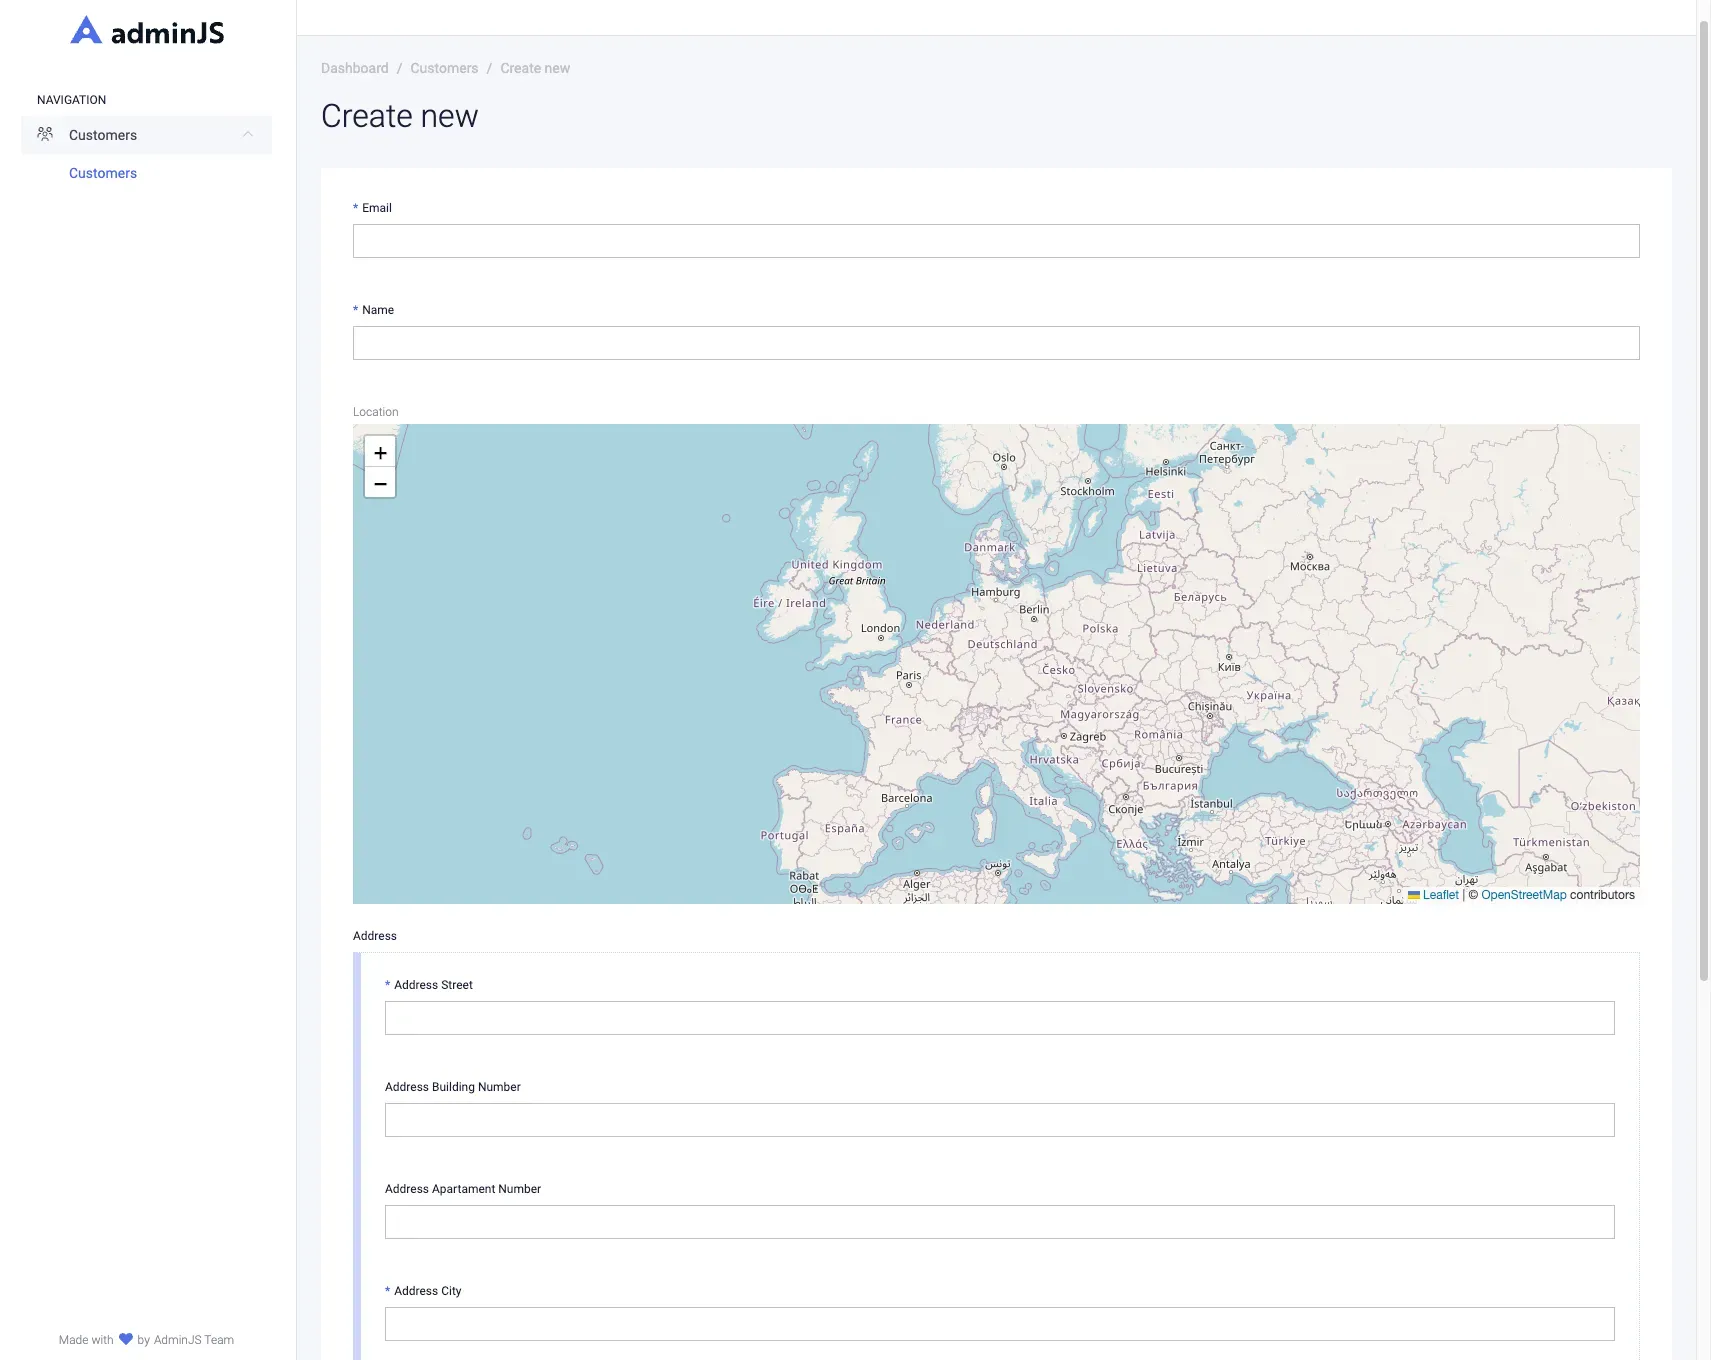
Now, however, if you provide the address, the map won’t be updated with a marker showing the address on the map.

Implementing reverse geocoding
As previously mentioned we’re going to take advantage of the Nominatim API. Take a look at the documentation of the /search endpoint, it will come in handy.
We will use the Geocode JSON format. Here is an example URL:
https://nominatim.openstreetmap.org/search?q=Athenes+Greece&format=geocodejsonThis returns a Geocode JSON with the following data:
{
  "type": "FeatureCollection",
  "geocoding": {
    "version": "0.1.0",
    "attribution": "Data © OpenStreetMap contributors, ODbL 1.0. https://osm.org/copyright",
    "licence": "ODbL",
    "query": "Athenes Greece"
  },
  "features": [
    {
      "type": "Feature",
      "properties": {
        "geocoding": {
          "place_id": 309408577,
          "osm_type": "node",
          "osm_id": 441183,
          "osm_key": "place",
          "osm_value": "city",
          "type": "city",
          "label": "Athens, Municipality of Athens, Regional Unit of Central Athens, Attica, 104 31, Greece",
          "name": "Athens"
        }
      },
      "geometry": {
        "type": "Point",
        "coordinates": [
          23.7283052,
          37.9839412
        ]
      }
    }
  ]
}
Let’s see where the coordinates point to.
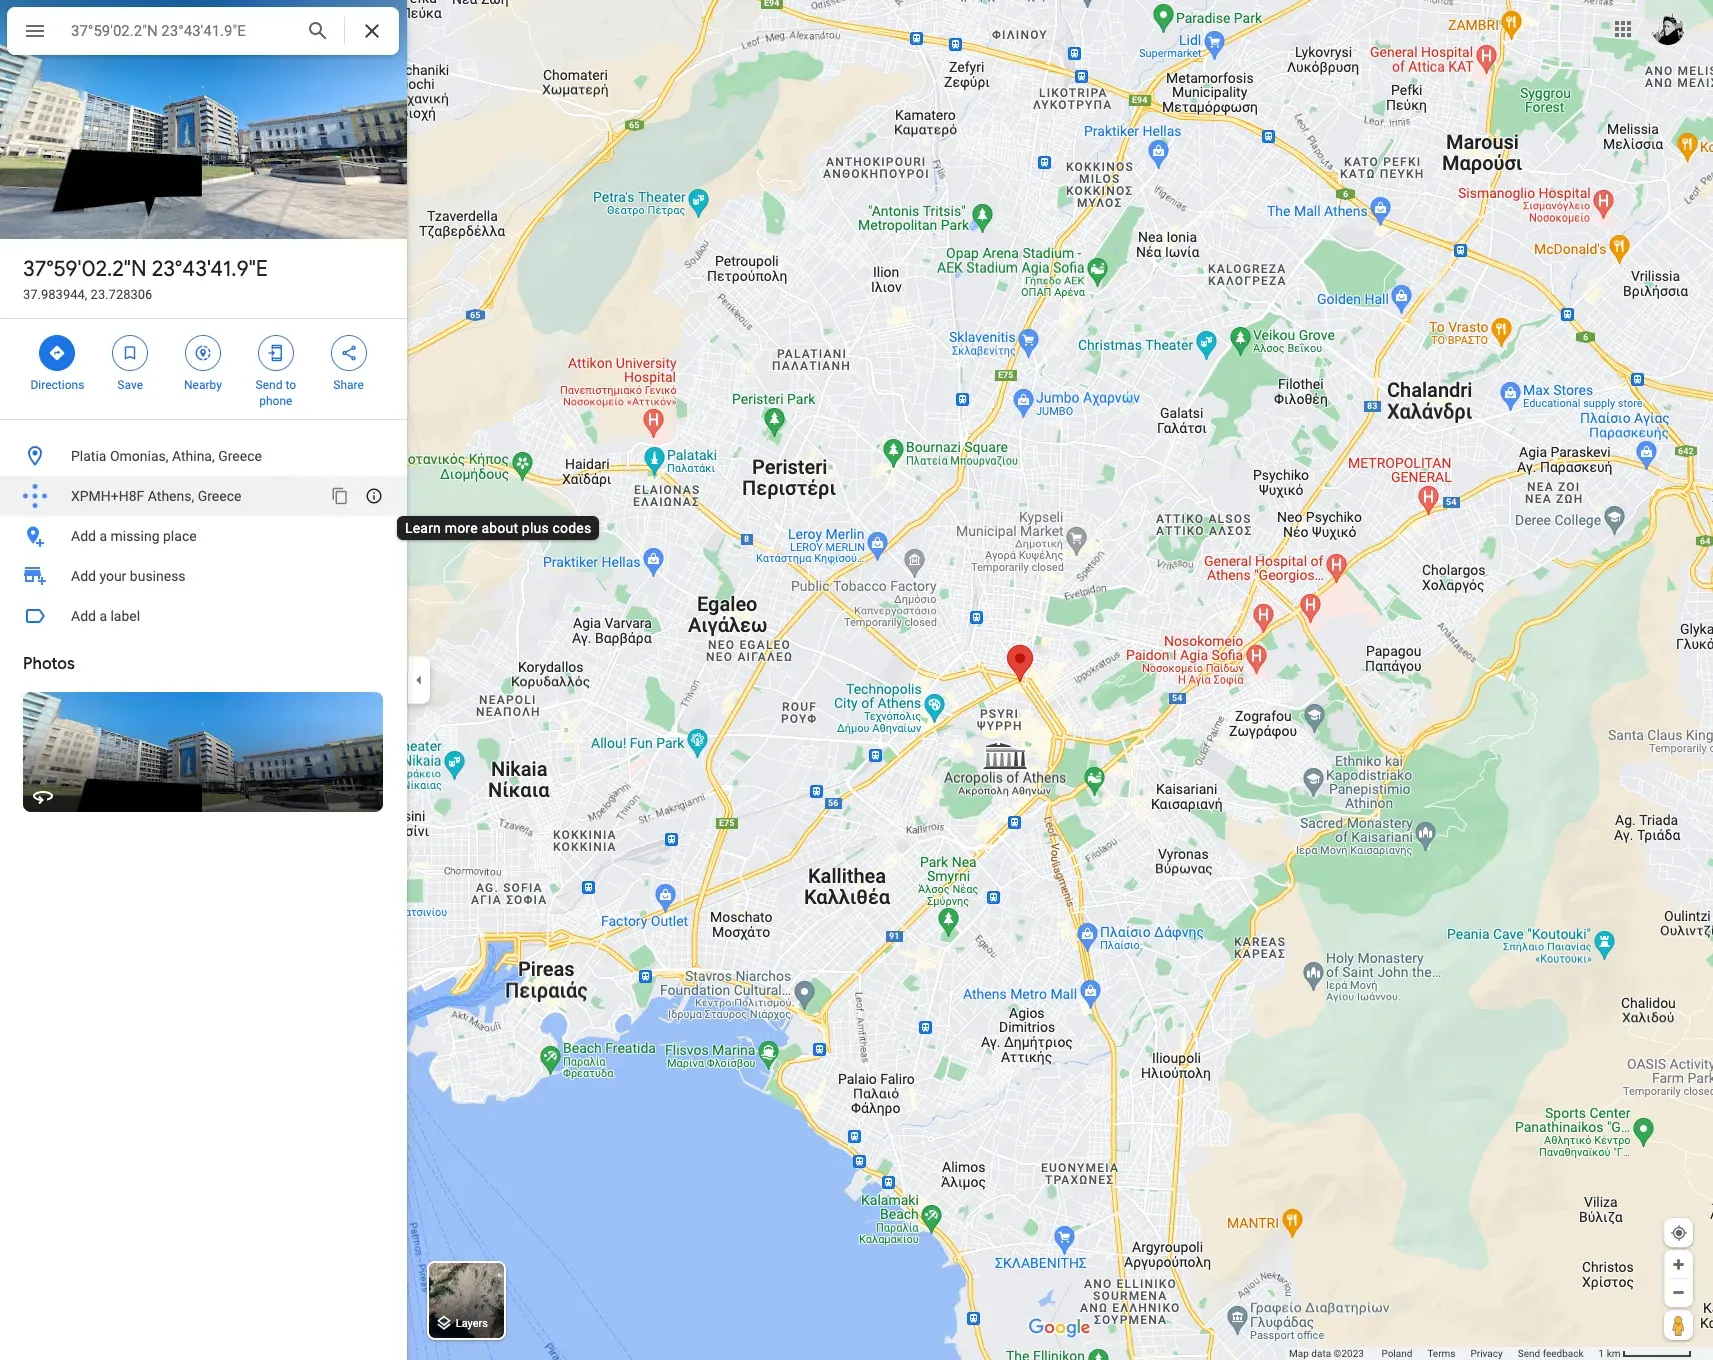
Looks like we landed in the middle of Athens, Greece — just as expected, great!
We will have to build on the information available through the Nominatim documentation.
We’re going to need to use Axios for our GET requests.
$ yarn add axios
Let’s create a folder called ‘custom_components’ inside our ‘src’ directory. Inside the former create a ‘geocoding.component.ts’ file. We will need to create an after function — it’s essentially a hook that runs once the action (in this case new action) completes.
import { After } from 'adminjs'
import axios from 'axios'

interface Address {
  street: string
  buildingNumber: string
  city: string
}

interface Coords {
  longtitude: string
  latitude: string
}

export const geocode: After<any> = async (response, request, context): Promise<any> => {
  const { record, resource } = context
  const address: Address = {
    street: record.params['address.street'].replace(/ /g, '+'),
    buildingNumber: record.params['address.buildingNumber'].replace(/ /g, '+'),
    city: record.params['address.city'].replace(/ /g, '+')
  }

  const getCords = async (address: Address): Promise<Coords> => {
    const axiosResponse = await axios.get(`https://nominatim.openstreetmap.org/search?q=${address.street}+${address.buildingNumber}+${address.city}&format=geocodejson`)
    return {
      longtitude: axiosResponse.data.features[0].geometry.coordinates[0].toString(),
      latitude: axiosResponse.data.features[0].geometry.coordinates[1].toString()
    }
  }

  await resource.update(record.id(), await getCords(address))

  return response
}
First, we will need to get the street name, building number, and city from the record we are creating, and make sure the spaces are replaced with pluses (as per the API endpoint syntax). Once we’ve got that, we can send an Axios request to the aforementioned URL. Since this is asynchronous code we will need to wait while the request completes. With the response available we can update the record with the coordinates.
With the geocoding function ready let’s add it to our resource. Head over to ‘customer.resource.ts’, and within the ‘createCustomerResource’ under the options parameter add the ‘geocode’ after hooks.
import { geocode } from '../custom_components/geocoding.component.js'

// ...

actions: {
  new: {
    after: [geocode]
},
  edit: {
    after: [geocode]
},

// ...
This will take care of pinning the address on the map, let’s see what it looks like.
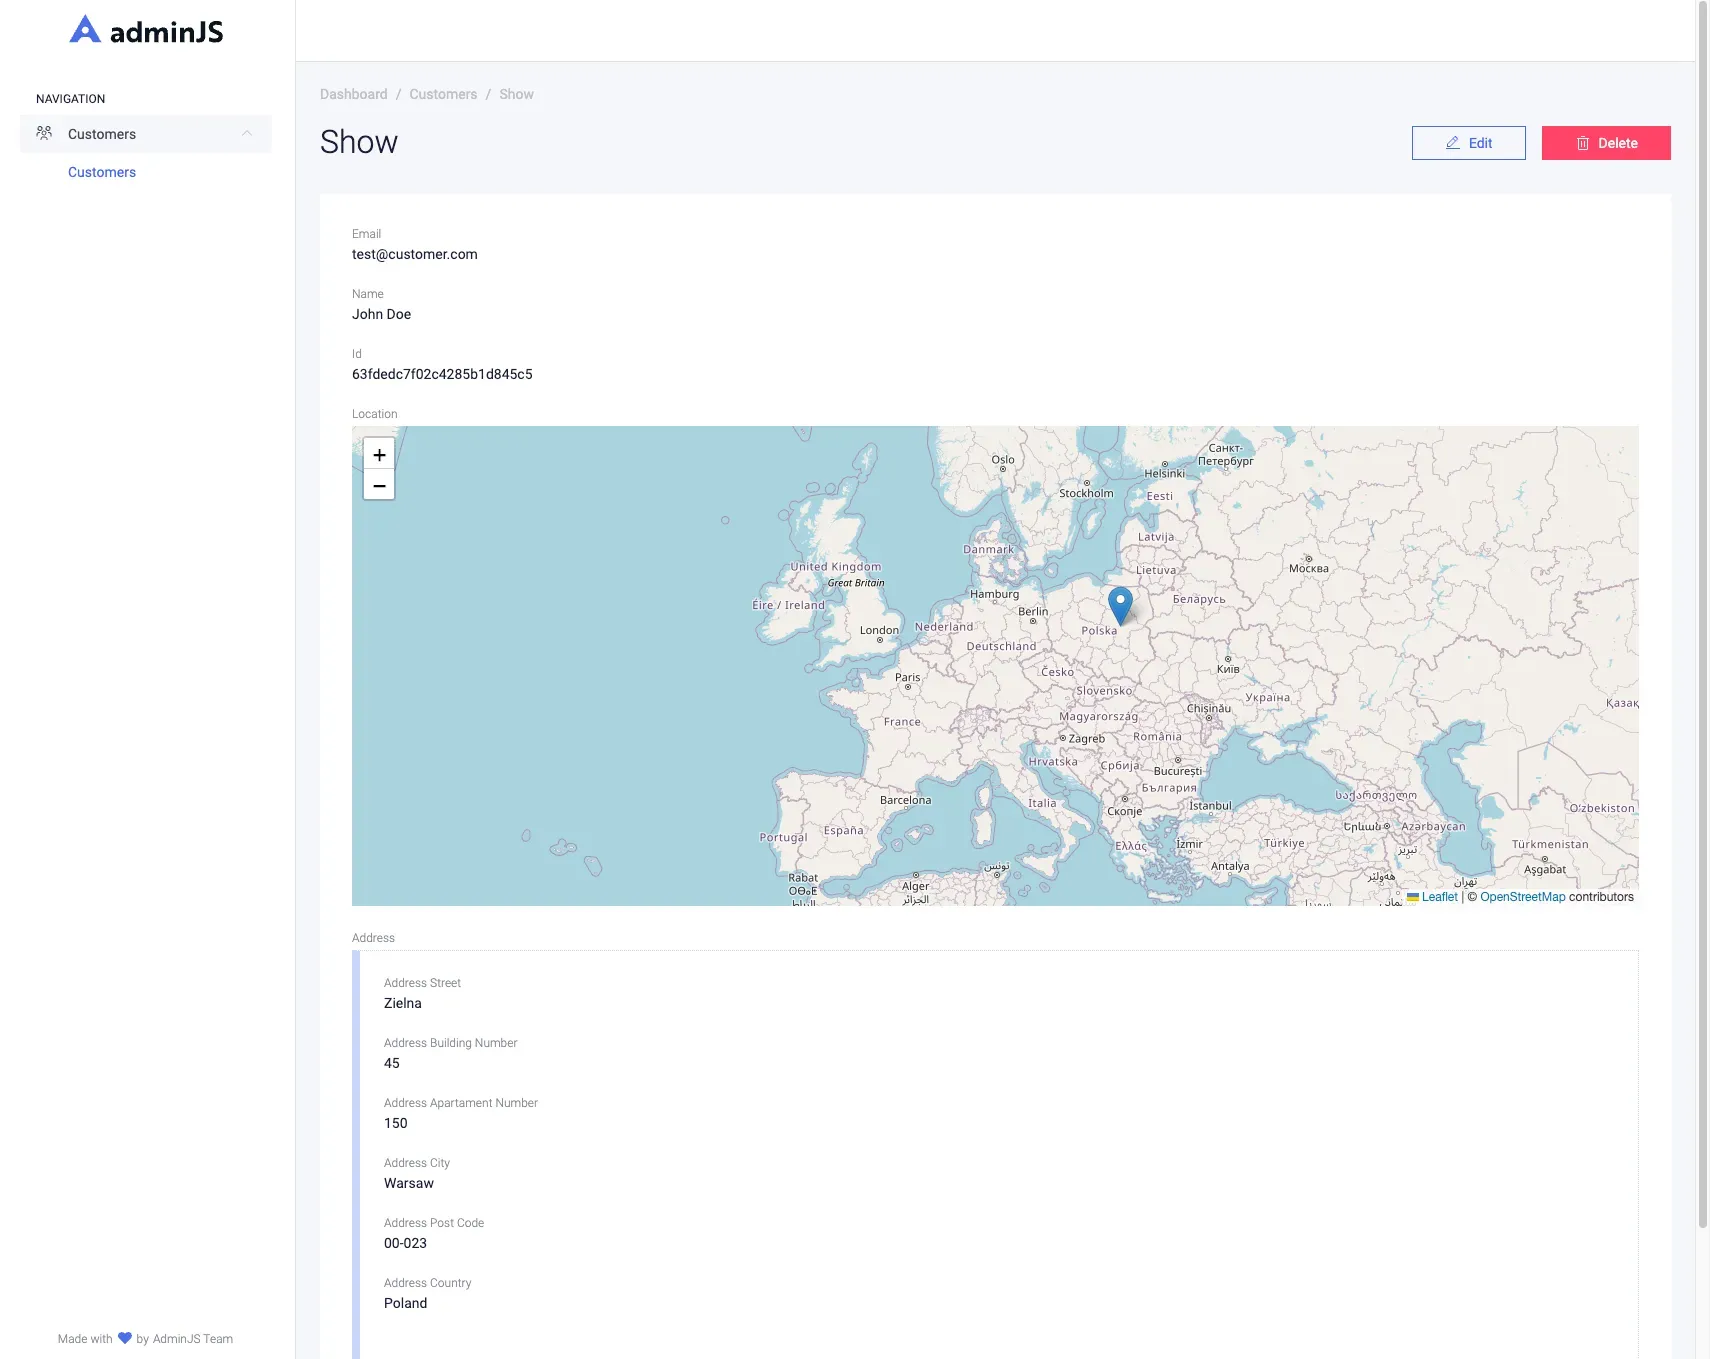
Enhance…
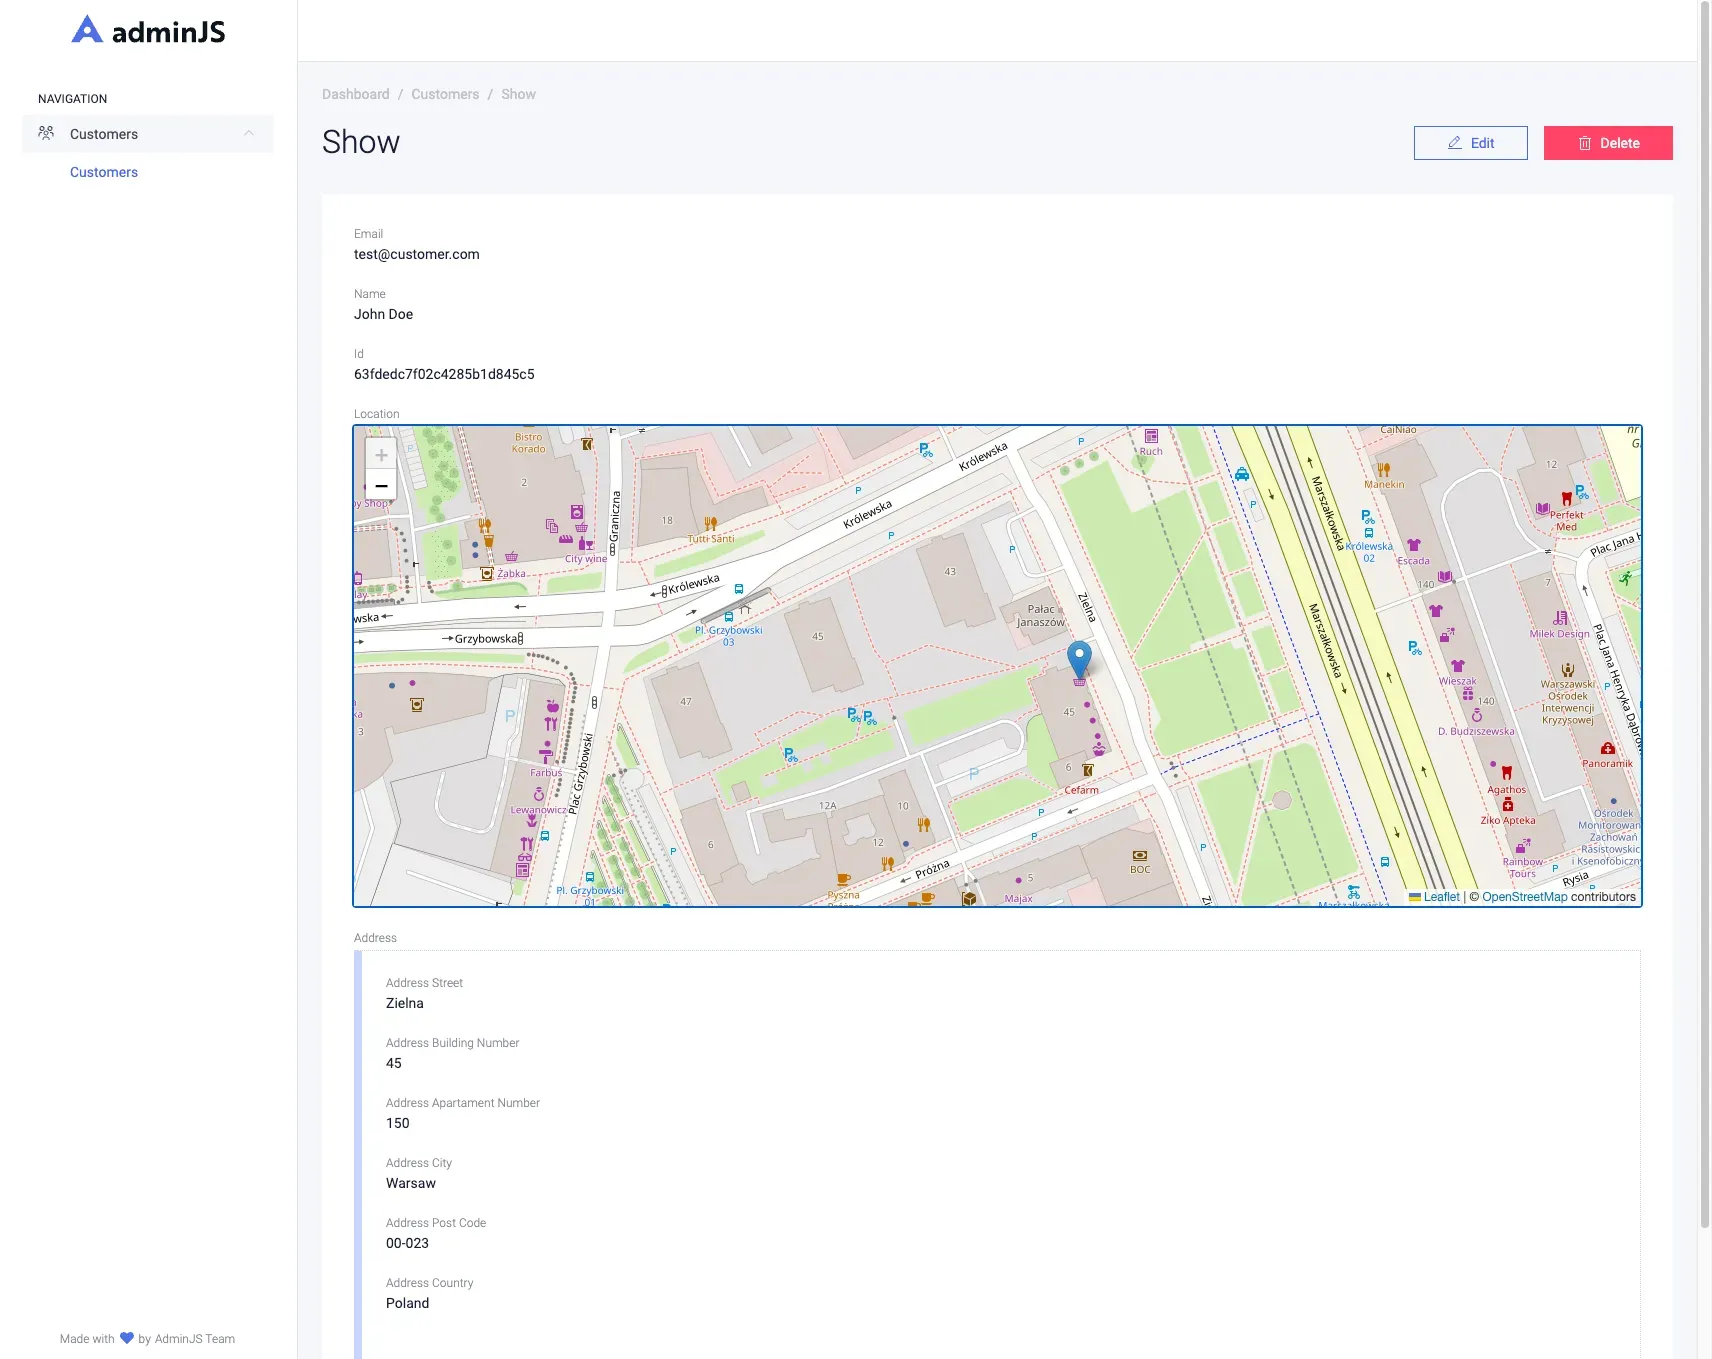
Looks spot on, great!
Implementing a shipping label generator
Now that we can store customers’ addresses, we actually can see where the packages are going to be shipped, let’s make our life a tad bit easier and generate the shipping labels with one click!
We’ve recently added a quick guide in our documentation that goes over generating PDF files within AdminJS, it can come in handy. See it here.
We’re going to use the jspdf library.
$ yarn add jspdf
Let's start by creating a function that will generate the files first. in your ‘custom_components’ folder create a file named ‘pdfgenerator.ts’.
import { RecordJSON } from 'adminjs'
import { jsPDF } from 'jspdf'

const pdfGenerator = (record: RecordJSON): string => {
  const { params } = record
  const doc = new jsPDF({
    orientation: 'l',
    format: 'letter'
  })
  const deliveryPadding = 150
  const returnPadding = 10

  doc.text('Delivery address:', deliveryPadding, 90)
  doc.text(params.name, deliveryPadding, 97)
  doc.text(params.email, deliveryPadding, 104)
  doc.text(params.phone.toString(), deliveryPadding, 111)
  doc.text(params['address.street'] + ' ' + params['address.buildingNumber'] + '/' + params['address.apartamentNumber'], deliveryPadding, 118)
  doc.text(params['address.postCode'] + ', ' + params['address.city'] + ', ' + params['address.country'], deliveryPadding, 125)

  doc.text('Return address:', returnPadding, returnPadding)
  doc.text('Super e-commerce company', returnPadding, 17)
  doc.text('info@superecommerce.company', returnPadding, 24)
  doc.text('646444782', returnPadding, 31)
  doc.text('Pariser Platz', returnPadding, 38)
  doc.text('10117 Berlin, Germany', returnPadding, 45)

  doc.text('Stamp here!', 230, 20)

  const filename = `/${params._id}.pdf`
  doc.save(`./src/pdfs${filename}`)

  return filename
}

export default pdfGenerator
I took the liberty of placing the data around the letter, but everything should be pretty self-explanatory.
Let’s take care of providing the required data to the ‘pdfGenerator’ function.
In the same directory create another file named ‘pdfgenerator.component.tsx’.
import React, { useEffect } from 'react'
import { ApiClient, ActionProps } from 'adminjs'
import { Loader } from '@adminjs/design-system'

const GeneratePdf: React.FC<ActionProps> = (props) => {
  const { record, resource } = props
  const api = new ApiClient()

  useEffect(() => {
    api.recordAction({
      recordId: record.id,
      resourceId: resource.id,
      actionName: 'PDFGenerator'
    }).then((response) => {
      window.location.href = response.data.url
    }).catch((err) => {
      console.error(err)
    })
  }, [])

  return <Loader />
}

export default GeneratePdf
We will need to pass the PDF generator component into the component loader. Head over to ‘index.ts’.
// ...

export const Components = {
  PDFGenerator: componentLoader.add('GeneratePDF', './custom_components/pdfgenerator.component')
}

// ...
Now onto our resource. In the ‘customer.resource.ts’ just beneath the geocode after hook let’s provide our custom component.
import { componentLoader, Components } from '../index.js'
import pdfGenerator from '../custom_components/pdfgenerator.js'

// ..

PDFGenerator: {
  actionType: 'record',
  icon: 'GeneratePdf',
  component: Components.PDFGenerator,
  handler: (request, response, context) => {
    const { record, currentAdmin } = context
    return {
      record: record.toJSON(currentAdmin),
      url: pdfGenerator(record.toJSON(currentAdmin))
    }
  }
}

// ...
Last but not least let’s create a place to store the PDFs, inside the ‘src’ folder create a directory named ‘pdfs’.
In the ‘index.ts’ file inside the ‘start’ function serve the ‘pdfs’ folder as a static directory.
import path from 'path'
// ...
app.use(express.static(path.join(__dirname, 'pdfs/')))
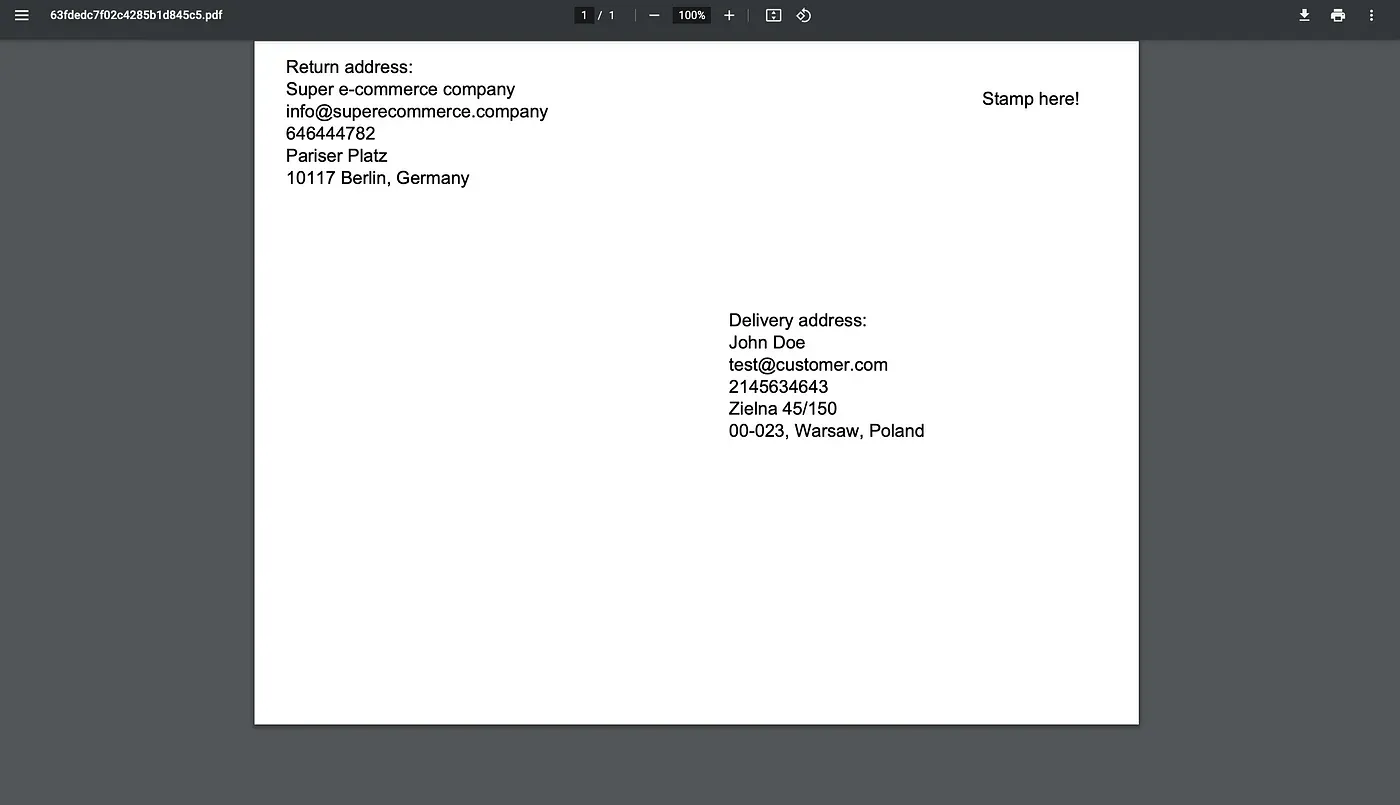
// ...Let’s see if it works.
Looks like it’s working!
Further steps
With that, we’ve created a kick-start app for our side business. There are various features that could be implemented to further develop the app. A good idea would be to integrate a shipment tracking API or add the order contents.
Be sure to check out our Slack Community if you have any questions, issues, or troubles with your AdminJS panel. If you are looking for a place to host your app, we also have AdminJS cloud for which a trial period is now available!
